To make sure you can see what I am doing I used two strands of yarn in a different colour. Once you understand how it works, you are going to use only one colour, from the same ball. No worries, there will be pictures, too!
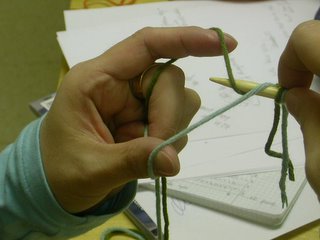
First thing you do, make a slip knot with both strands of yarn and slip it onto a needle, like this:
1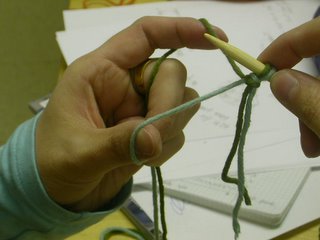 It would be good if you practised to hold the yarn as I do, but that shouldn't be a problem because it's the same way as if you do a long-tail cast-on.
The following pictues are pretty self explanatory, but I will try and add the one or other note anyhow.
2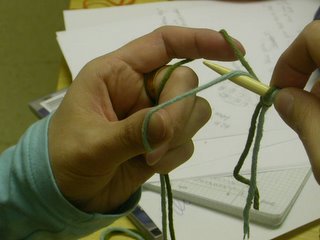
Bring the needle to the front and insert tip underneath the yarn .
3Then bring the tip behind the second strand of yarn (green).
4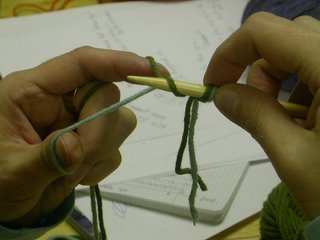 Pull the green yarn underneath the blue to the front.
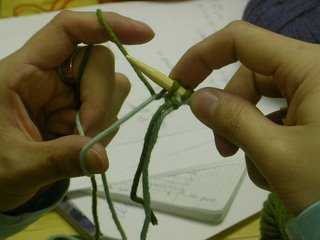 Tighten, so that the green yarn forms a stitch and the blue remains straight. Yay, one stitch made!
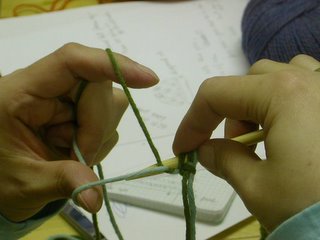 Now bring the tip of the needle from the top behind the green yarn, make sure you keep tension on the first stitch on the needle.
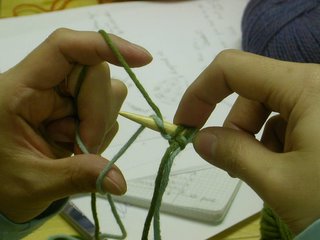 From behind bring the tip in front and start pulling it underneath the green yarn to the back.
 Tighten. There you have a lovely second stitch.

After this it starts all over again:
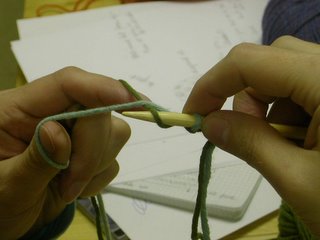
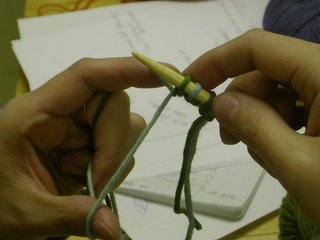 This is how it should look like after you cast on a number of stitches (click to enlarge).
After you are done casting on the number of stitches you need, you have to do the following: Twist both yarn strands in front of the first stitch (which should be a knit stitch, more on that next time) so the whole cast-on won't unravel and then knit into the back loop of the stitch like this: (Again, click to enlarge.)
The knit and purls stitches are fairly easy to make out, since they more or less look like they should - the knit stitch is open in front, the purl stitch is closed.
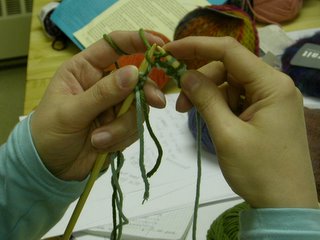
Then slip the next stitch (clearly defined as a purl stitch with the green yarn in front) with yarn in front purlwise.

Repeat till all stitches are done. (How to proceed from here will be in my next post.)

Using two different colours of yarn helps to grasp the concept of this cast-on, same with the slip knot which won't be needed for the actual two-strand cast-on in one colour that you will learn about next time!
Should there be any questions, feel free to ask. Otherwise: practise, practise...
A big thanks to Véronik who took the pictures - you know me, mine would be useless and fuzzy!

2 comments:
Thank you so much! I've been dying to knit a cute gilet in my Domiknitrix book but the instructions for tubular cast-on just made no sense to me - five minutes here & I have my stitches cast on & am ready to go :0)
This tutorial is very helpful for understanding how to do a two-strand tubular cast on.
Post a Comment