
You have to leave a tail long enough for half of the to be cast on stitches - then start out the same way as with two yarns. Insert the tip of the needle underneath the yarn (instead of having a slip-knot on the needle), and hold on tight.
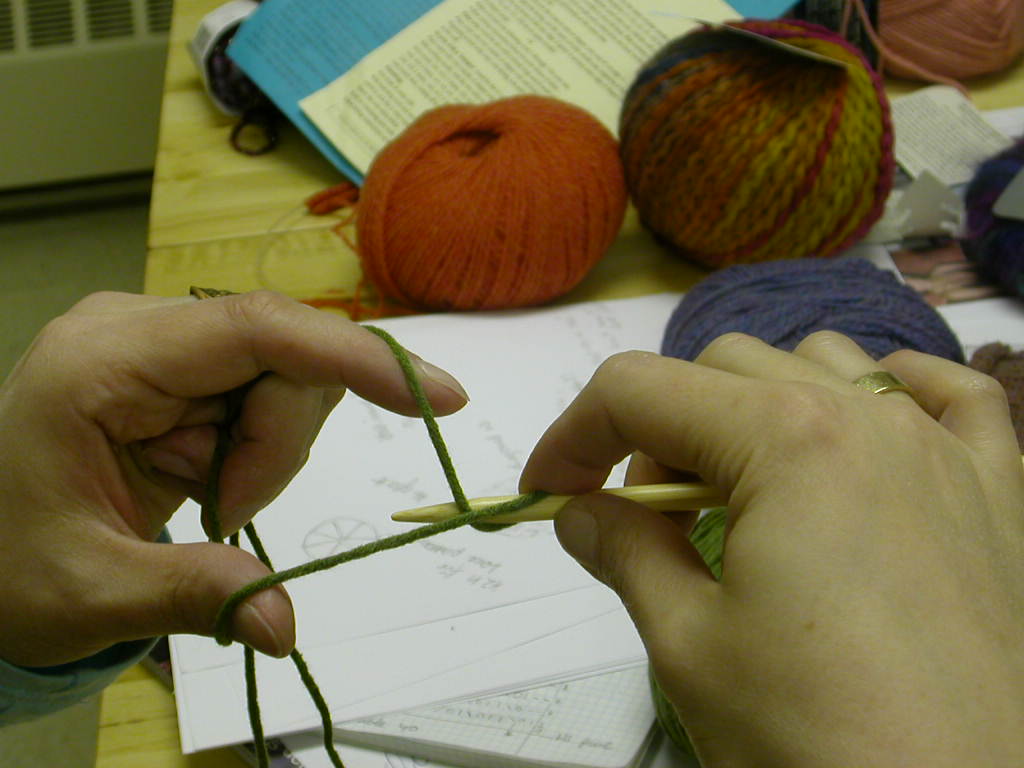
From underneath the yarn bring the tip of the needle behind the yarn coming from your forefinger and pull it through underneath the other strand of yarn.
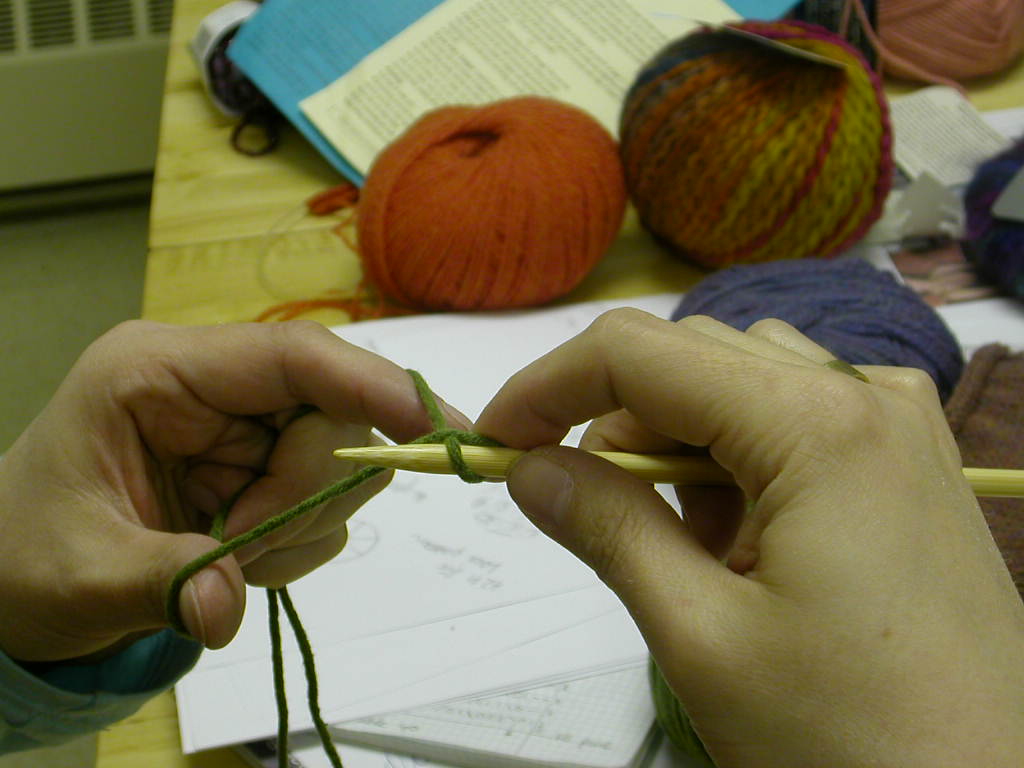
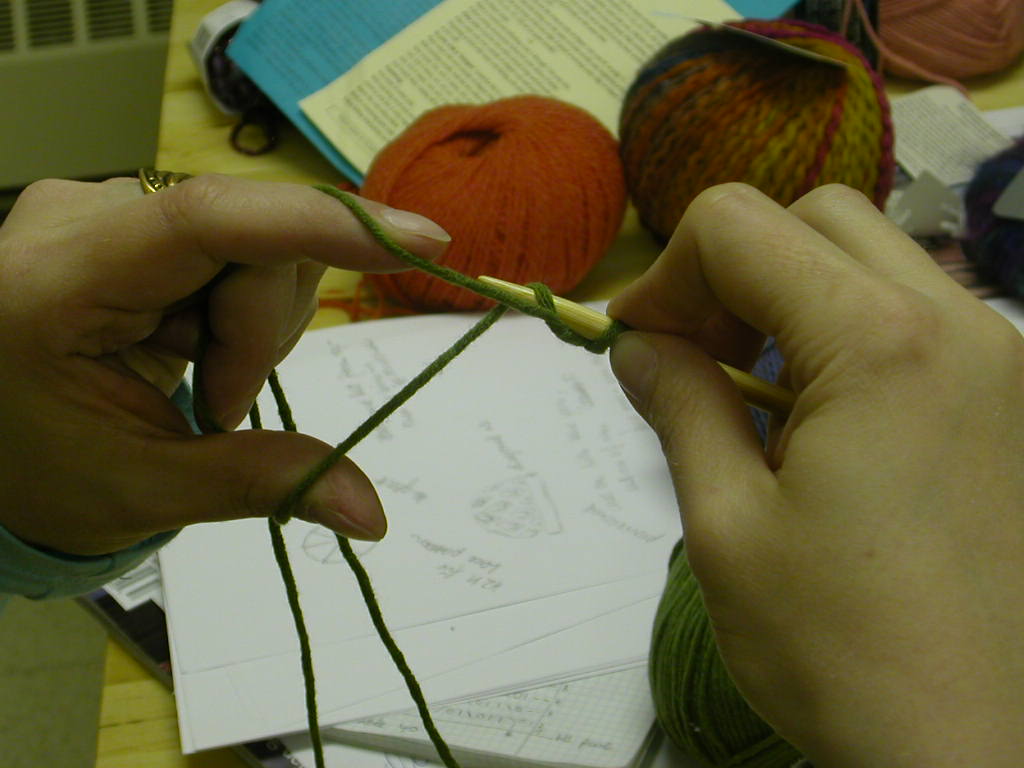
This forms the first stitch, it's more like a loop with a twist, but will end up as a purl stitch. You'll see.
There you have your first stitch. From here everything should seem familiar.
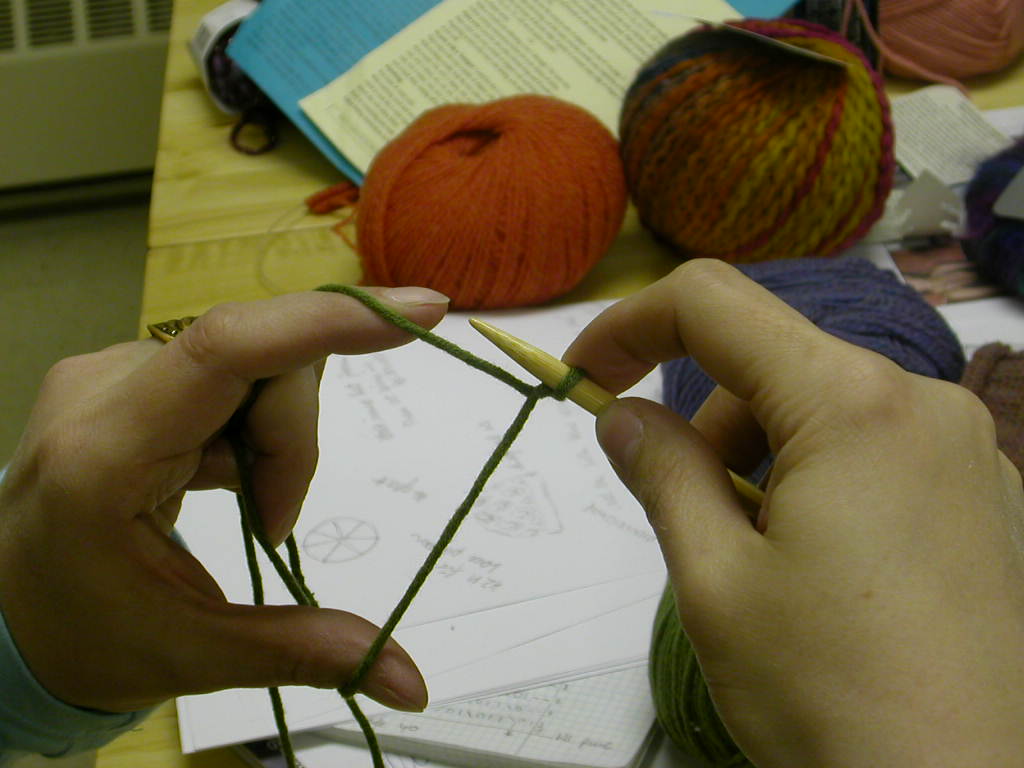
Bring the tip of the needle behind both strands.
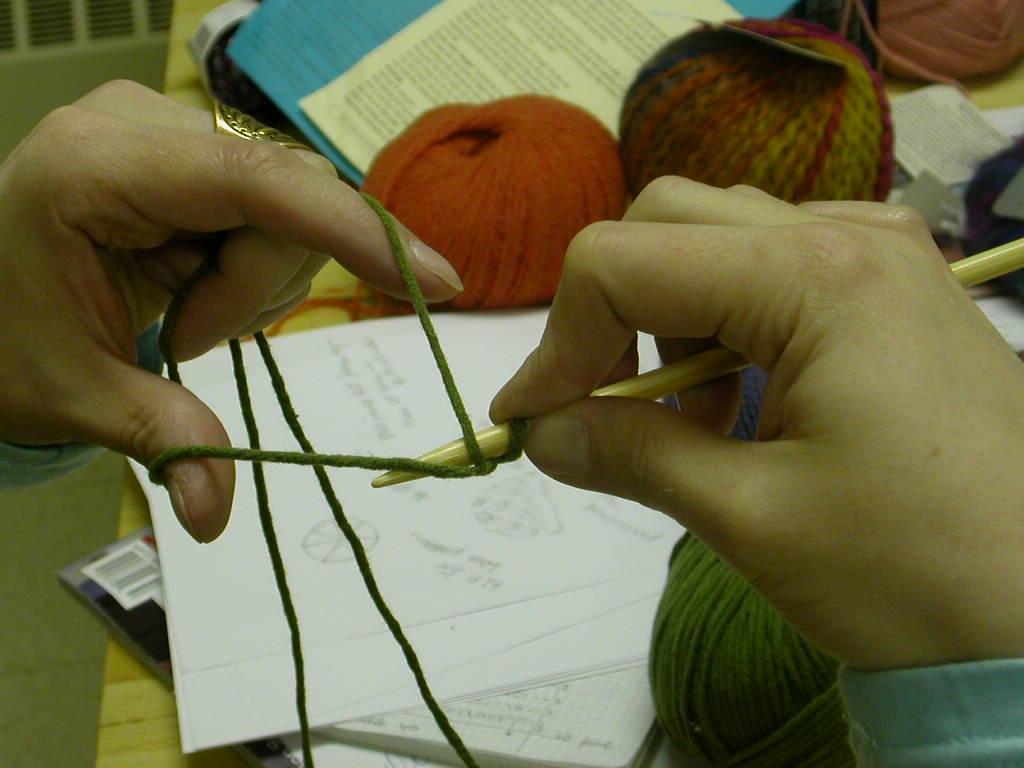
Pull the strand from the front underneath the one in the back, pull up, tighten, there, the second stitch!

Once you have arrived here, follow the steps of the first tutorial, starting at picture No. 2.
When you have cast-on the required 64 stitches, knit the first two rows as follows: knit the first st into backloop, slip the second st with yarn in front purlwise, do so with all sts (the last one will be a slip stitch). Turn. Repeat on second row.
Starting with the third row you will knit and purl. When knitting the socks you distribute the stitches onto your dpns when the first two rows after the cast-on are done. Close to round, knit the first stitch into backloop, purl the next, etc. The little gap of the first two rows can be easily closed when weaving the end in.
Of course the stitches don't have to be knit into the backloop, I chose to do so to give the rib more definition.

When done correctly the two-strand tubular cast-on provides a smooth, very stretchy edge, reminiscent of the ones you see on store bought socks and sweaters.
If you choose to try it and find this was helpful, please, let me know! Thanks.
7 comments:
Thank you Mona for those explanations! I tried this method before, but I had trouble keeping the tension even. I'll try again! I guess I just need some practice... and a more patience ;-)
Thanks Mona
I have tried that on my own and never was able to succeed.
I am swatching for a new pair of socks - when i am finished i will sit in front of my boyfriend's laptop (Wi-fi) and try it !!!
Do you have a hotline ??? Ah! Ah!
Lolly sent me here because I liked your sock in IK. After seeing this tutorial I just might give the tubular cast on a try!
Fabulous tutorial!!!! I just cast on for my second pair of Embossed Leaves socks, and I used this tutorial to get the right cast-on. Very happy. I've even posted a link to you on my own blog. Well done. And thank you :)
Thank you so much for this tutorial!!!! I was having a devil of a time trying to follow the cast on instructions in the Interweave book. Your tutorial saved the day!
Cheers,
Deb in Atlanta
I just tried this, and although it took a few tries to get the hang of it, it was well worth it, and easy to follow, too! I admittedly didn't practice with two colors as suggested; that probably would gave made for a smoother learning curve. I don't think I'll ever again use a long-tail cast on for a pair of socks!
Thanks so much, Mona! Very helpful!
Post a Comment